Why You’ll Love This Recipe
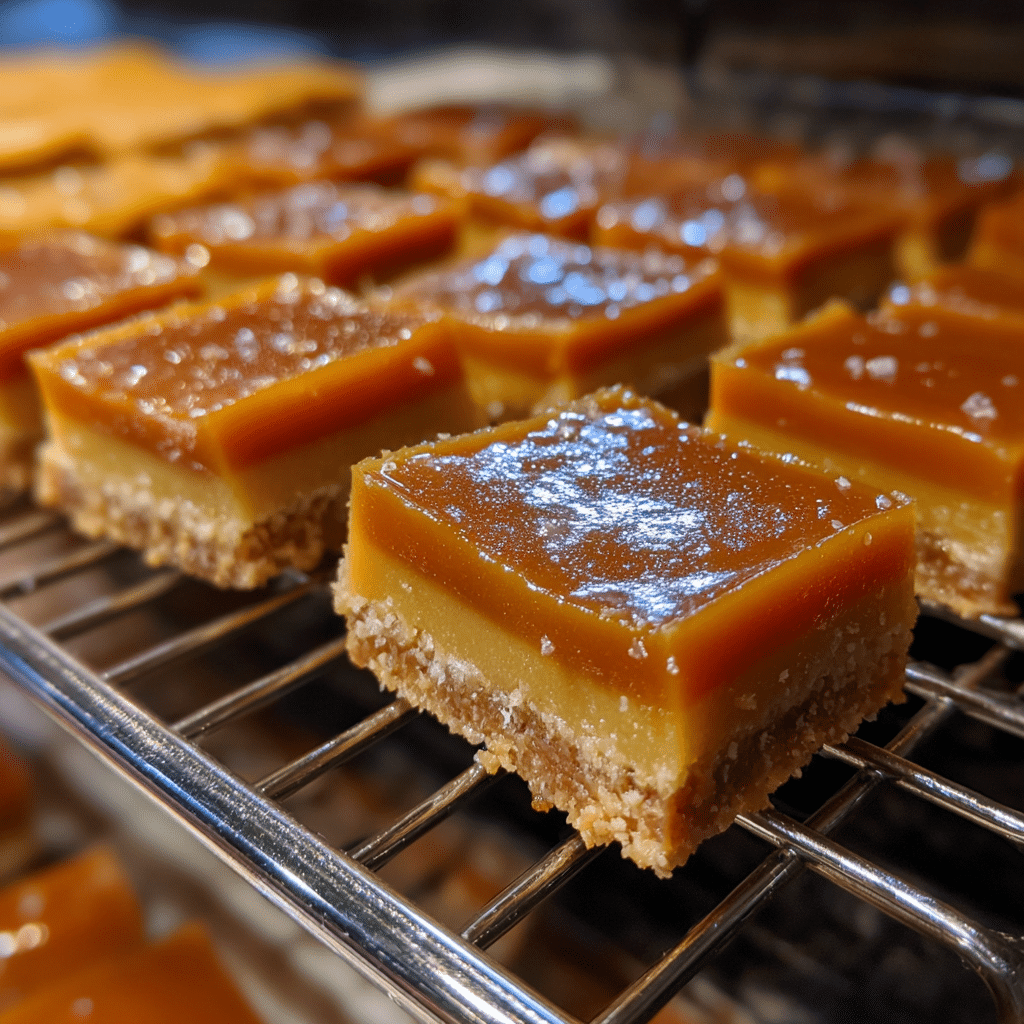
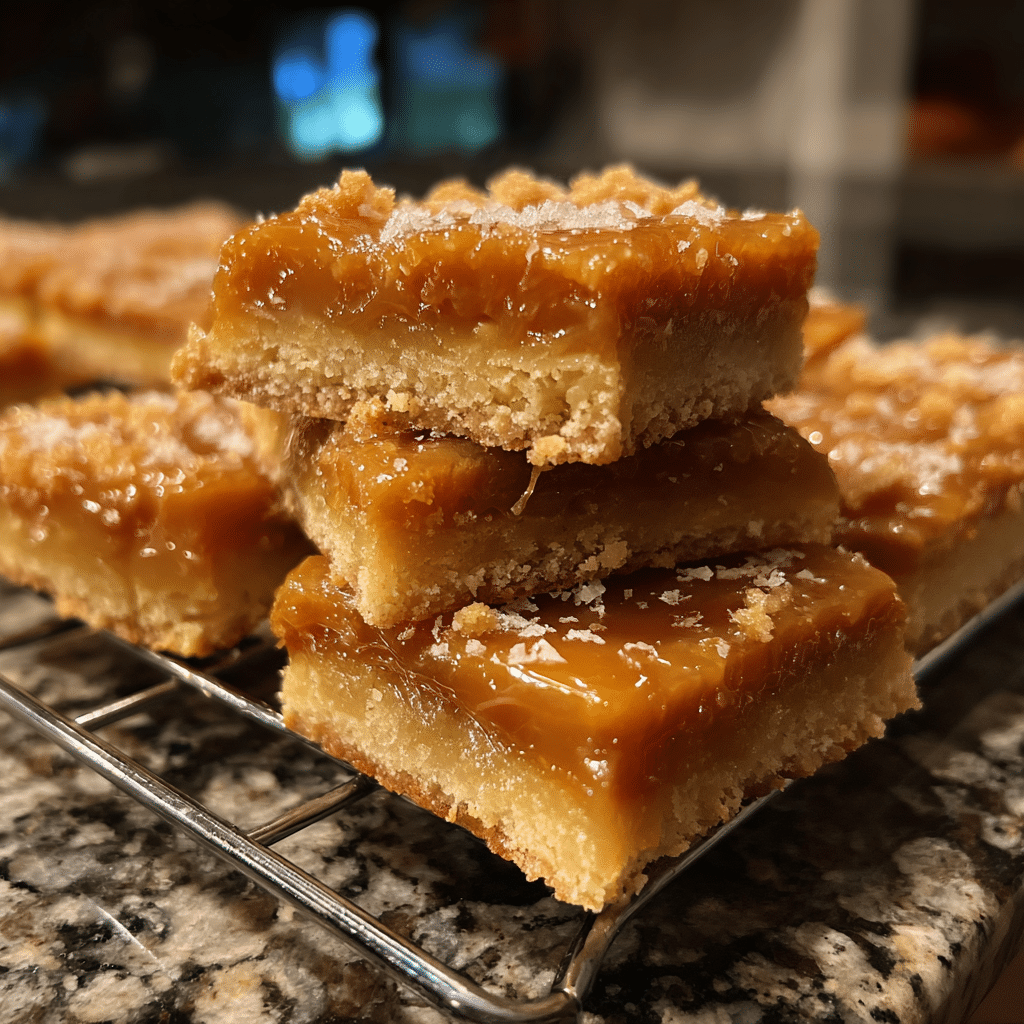
Salted Caramel Butter Bars are the kind of treat that instantly wins people over. They combine a rich, buttery base with a smooth caramel center and just enough salt to balance the sweetness perfectly. The texture is soft yet sturdy, making these bars easy to slice, serve, and enjoy without fuss. They are indulgent without being overwhelming, which makes them ideal for both casual snacking and special occasions.
I started making these bars when I needed a dessert that could travel well and still feel homemade and thoughtful. After a few test batches, I discovered that a generous pinch of flaky sea salt on top makes all the difference. These bars stay tender for days, cut cleanly, and disappear quickly wherever they are served. If you are looking for a reliable crowd-pleaser with classic flavors, this recipe is a dependable choice.
Print
Salted Caramel Butter Bars for Snacks or Parties That Everyone Loves
- Total Time: 50 minutes
- Yield: 16 bars
- Diet: Vegetarian
Description
Rich and chewy salted caramel butter bars with a buttery shortbread base and a gooey caramel center, perfect for snacks, parties, or dessert trays.
Ingredients
- 1 cup unsalted butter, softened
- 1 cup granulated sugar
- 1 tsp vanilla extract
- 2 cups all-purpose flour
- 1/2 tsp salt
- 1/2 cup caramel sauce (thick)
- 1/2 tsp flaky sea salt (for topping)
Instructions
- Preheat the oven to 350°F (175°C) and line an 8×8-inch baking pan with parchment paper.
- Cream the butter and sugar together until light and fluffy.
- Mix in vanilla extract.
- Add flour and salt and mix until a soft dough forms.
- Press two-thirds of the dough evenly into the prepared pan.
- Spread caramel sauce evenly over the dough layer.
- Crumble the remaining dough over the caramel layer.
- Bake for 30–35 minutes until lightly golden.
- Remove from oven and sprinkle with flaky sea salt.
- Cool completely before slicing into bars.
Notes
- Use thick caramel sauce to prevent leaking.
- Chill before slicing for cleaner cuts.
- Bars can be stored airtight for up to 5 days.
- Prep Time: 15 minutes
- Cook Time: 35 minutes
- Category: Dessert
- Method: Baking
- Cuisine: American
Ingredients
(Tip: You can find the complete list of ingredients and their measurements in the recipe card below.)
All-purpose flour
Flour provides the structure for the buttery layers, keeping the bars sturdy yet tender.
Unsalted butter
Butter is the foundation of this recipe, delivering richness, flavor, and a melt-in-the-mouth texture.
Granulated sugar
Granulated sugar sweetens the dough and helps create a soft, balanced crumb.
Brown sugar
Brown sugar adds moisture and a subtle caramel-like depth to the buttery layers.
Sweetened condensed milk
This is the base of the caramel filling, creating a smooth, rich center once baked.
Caramel sauce or caramel candies
Caramel adds sweetness and chewiness, forming the signature middle layer of the bars.
Vanilla extract
Vanilla enhances the caramel flavor and rounds out the sweetness.
Salt
Salt balances the sweetness and enhances the buttery and caramel notes.
Flaky sea salt
Used as a topping, flaky sea salt adds contrast and a refined finish.
Directions
Preheat your oven to 175°C and line a square baking pan with parchment paper, leaving an overhang for easy removal.
In a large bowl, combine flour, granulated sugar, brown sugar, and salt. Cut in the butter until the mixture resembles soft crumbs. Press about two-thirds of this mixture firmly into the bottom of the prepared pan to form the base.
In a separate bowl, mix the sweetened condensed milk, caramel sauce or melted caramel candies, and vanilla extract until smooth. Pour the caramel mixture evenly over the pressed base.
Sprinkle the remaining crumb mixture over the caramel layer, gently pressing it down slightly. Bake for 30 to 35 minutes, or until the top is lightly golden and set.
Remove from the oven and immediately sprinkle with flaky sea salt. Allow the bars to cool completely in the pan before lifting out and slicing into squares.
Equipment needed
Must-Have Tools to Get Rolling
Here’s what you’ll want to have on hand:
Silicone Spatula – Durable, heat-resistant silicone spatula perfect for mixing, scraping, and spreading. Gentle on non-stick cookware and easy to clean.
Large pot – You’ll need this to boil the whole cabbage head and soften the leaves.
large bowl –Spacious, durable large bowl ideal for mixing, serving, or food preparation. Made from sturdy material and easy to clean.
Sharp knife – For coring the cabbage and slicing out the thick stem in each leaf. A paring knife works best.
Mixing bowl – A big bowl makes it easier to combine your meat and rice filling evenly.
Cutting board – For prepping cabbage leaves and rolling them like a pro.
Full-Size Blender – is a powerful kitchen appliance for making smoothies, soups, and sauces in large batches.
3-in-1 Air Fryer – This versatile 3-in-1 air fryer offers Air Fry for healthier meals with less oil, Bake for bakery-quality desserts and treats, and Reheat to bring leftovers back to life with crispy, flavorful results
Servings and timing
This recipe yields approximately 16 to 20 bars.
Preparation time is about 15 minutes, baking time is 35 minutes, and cooling time is 45 minutes.
Storage/reheating
Store the bars in an airtight container at room temperature for up to three days or refrigerate for up to one week. For a softer texture, allow chilled bars to come to room temperature before serving. Reheating is not necessary.
Variations and Customizations
Salted Caramel Butter Bars are easy to adapt while keeping their classic appeal. For a richer flavor, you can brown the butter before mixing it into the dough. This adds a nutty depth that pairs beautifully with caramel.
Chocolate lovers may enjoy adding a thin layer of melted chocolate over the caramel before topping with the remaining crumbs. Chopped nuts such as pecans or walnuts can also be sprinkled into the caramel layer for added crunch.
If you prefer a less sweet version, reduce the caramel slightly and increase the salt topping. You can also cut these bars into smaller portions for bite-sized party treats. Each variation maintains the buttery base while offering a new flavor experience.
Nutrition and Dietary Info
These bars are rich and indulgent, best enjoyed in moderation. They can be adapted using gluten-free flour blends, though texture may vary slightly.
Expert Tips & Customizations
Firm base
Press the bottom layer firmly to prevent crumbling after baking.
Clean cuts
Allow the bars to cool completely before slicing for neat edges.
Salt balance
Add flaky salt gradually and taste to avoid over-seasoning.
FAQs
Can I make these bars ahead of time?
Yes, they store very well and taste even better the next day.
Can I freeze salted caramel butter bars?
Yes, wrap tightly and freeze for up to two months.
Why is my caramel too runny?
The bars may need more cooling time to set fully.
Can I use homemade caramel?
Yes, homemade caramel works beautifully.
Do I need a mixer?
No, this recipe can be made entirely by hand.
Can I reduce the sugar?
Slightly, but it may affect texture and structure.
What pan size works best?
A standard 9-inch square pan is ideal.
Should I use salted or unsalted butter?
Unsalted butter gives better control over salt levels.
Are these good for parties?
Yes, they are easy to transport and serve.
Can I add chocolate chips?
Yes, chocolate chips pair well with caramel.
Conclusion
Salted Caramel Butter Bars are a timeless, crowd-pleasing dessert that delivers rich flavor and comforting texture in every bite. Easy to prepare and perfect for sharing, they are ideal for snacks, parties, or make-ahead treats. This recipe offers dependable results and irresistible flavor that will keep people coming back for more.
Hungry for more? Visit our website for full recipes and follow us on Pinterest for daily foodie inspo you’ll love to pin!