Why You’ll Love This Recipe
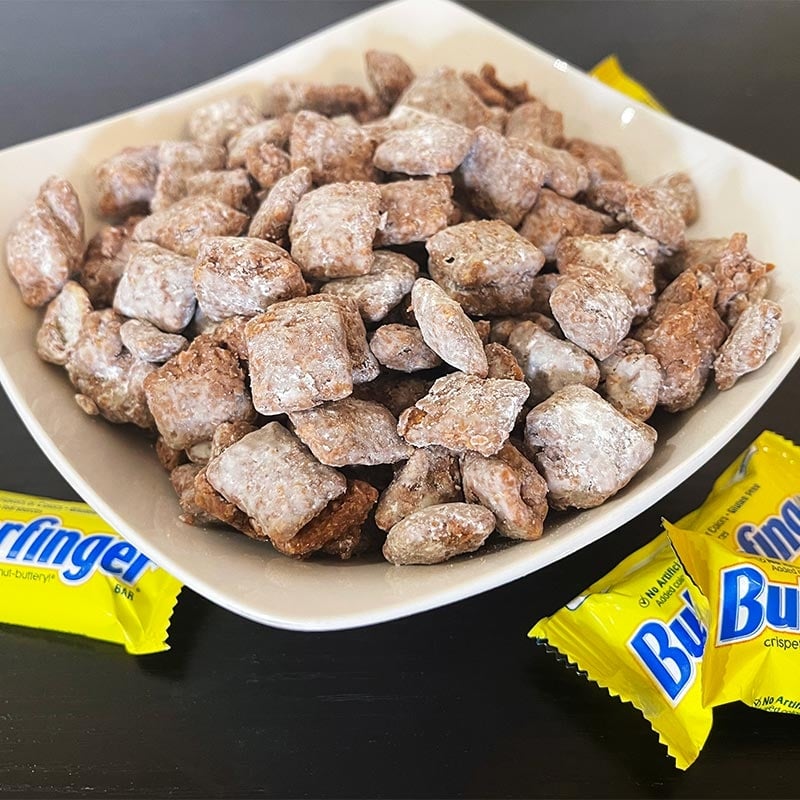
Butterfinger Puppy Chow is a fun and indulgent twist on the classic no-bake snack that many people grew up loving. It combines crunchy cereal with creamy peanut butter, smooth melted chocolate, and the unmistakable flavor of Butterfinger candy. The result is a sweet, crunchy, and slightly salty treat that is nearly impossible to stop eating. This recipe is especially appealing because it requires no oven time and comes together quickly, making it perfect for last-minute gatherings, movie nights, or holiday snack trays.
What truly sets this version apart is the added texture and flavor from the crushed Butterfinger pieces. I tested this recipe with different candy-to-cereal ratios, and the balance here delivers consistent flavor in every handful without becoming overly sweet. It also stores well and travels easily, which makes it ideal for sharing. If you enjoy simple desserts with bold flavor and minimal effort, this Butterfinger Puppy Chow is a recipe worth keeping.
Print
Butterfinger Puppy Chow – An Irresistible No-Bake Treat
- Total Time: 15 minutes
- Yield: 10 cups
- Diet: Vegetarian
Description
An irresistible twist on classic puppy chow made with crunchy cereal coated in peanut butter, chocolate, and crushed Butterfinger candy for extra crunch and sweetness.
Ingredients
- 9 cups Rice Chex cereal
- 1 cup milk chocolate chips
- 1/2 cup creamy peanut butter
- 1/4 cup unsalted butter
- 1 tsp vanilla extract
- 1 1/2 cups powdered sugar
- 1 cup Butterfinger candy bars, crushed
Instructions
- Place cereal in a large mixing bowl and set aside.
- In a microwave-safe bowl, combine chocolate chips, peanut butter, and butter.
- Microwave in 30-second intervals, stirring between, until melted and smooth.
- Stir in vanilla extract.
- Pour chocolate mixture over cereal and gently toss until evenly coated.
- Add crushed Butterfinger and gently mix.
- Transfer coated cereal to a large zip-top bag or bowl.
- Add powdered sugar, seal, and shake until fully coated.
- Spread out to cool completely before serving.
Notes
- Let cool fully before storing to avoid clumping.
- Store in an airtight container for up to 1 week.
- Great for parties, holidays, or gifting.
- Prep Time: 10 minutes
- Cook Time: 5 minutes
- Category: Dessert
- Method: No-Bake
- Cuisine: American
Ingredients
(Tip: You can find the complete list of ingredients and their measurements in the recipe card below.)
Rice cereal squares
Rice cereal provides the crisp base of this snack. Its light texture allows it to coat evenly with chocolate and peanut butter while staying crunchy.
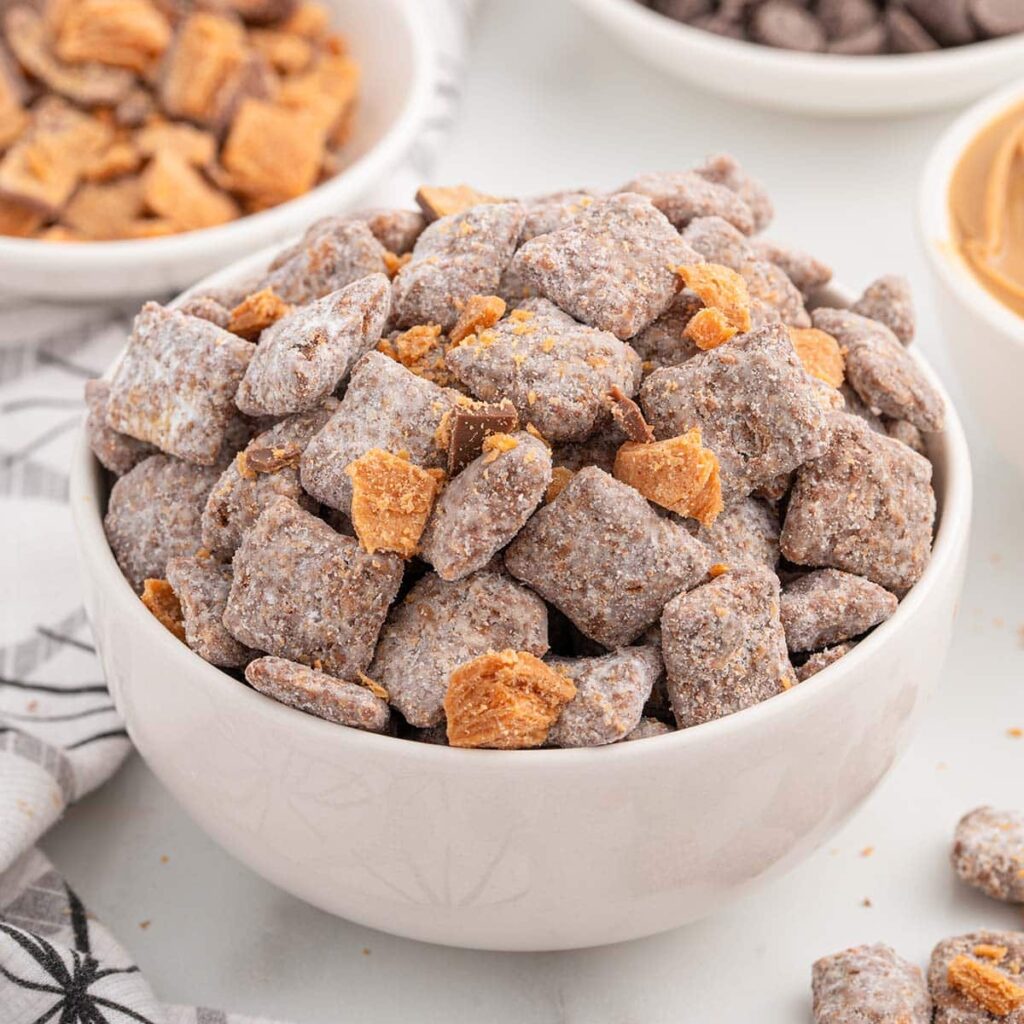
Butterfinger candy bars
Butterfinger adds a distinctive crunchy peanut-buttery flavor. When crushed, it distributes evenly and enhances both taste and texture.
Semi-sweet chocolate chips
Chocolate chips form the main coating. Semi-sweet chocolate balances the sweetness of the candy and powdered sugar.
Creamy peanut butter
Peanut butter adds richness and helps bind the chocolate coating to the cereal. Creamy varieties work best for smooth coverage.
Butter
Butter contributes to a silky melted mixture and deepens the overall flavor of the coating.
Vanilla extract
Vanilla enhances the sweetness and rounds out the chocolate and peanut butter notes.
Powdered sugar
Powdered sugar coats the cereal and prevents sticking while giving the snack its signature sweet finish.
Directions
Begin by placing the rice cereal squares into a large mixing bowl and setting them aside. In a microwave-safe bowl, combine the chocolate chips, peanut butter, and butter. Heat in short intervals, stirring between each, until the mixture is fully melted and smooth. Stir in the vanilla extract.
Pour the melted chocolate mixture over the cereal. Gently fold until all pieces are evenly coated, taking care not to crush the cereal. Add the crushed Butterfinger candy and mix lightly to distribute it throughout the coated cereal.
Transfer the mixture to a large resealable bag or a clean bowl with a lid. Add the powdered sugar, seal, and shake gently until all pieces are well coated. Spread the puppy chow onto a parchment-lined surface and allow it to cool completely before serving.
Equipment needed
Must-Have Tools to Get Rolling
Here’s what you’ll want to have on hand:
Silicone Spatula – Durable, heat-resistant silicone spatula perfect for mixing, scraping, and spreading. Gentle on non-stick cookware and easy to clean.
Large pot – You’ll need this to boil the whole cabbage head and soften the leaves.
large bowl –Spacious, durable large bowl ideal for mixing, serving, or food preparation. Made from sturdy material and easy to clean.
Sharp knife – For coring the cabbage and slicing out the thick stem in each leaf. A paring knife works best.
Mixing bowl – A big bowl makes it easier to combine your meat and rice filling evenly.
Cutting board – For prepping cabbage leaves and rolling them like a pro.
Full-Size Blender – is a powerful kitchen appliance for making smoothies, soups, and sauces in large batches.
3-in-1 Air Fryer – This versatile 3-in-1 air fryer offers Air Fry for healthier meals with less oil, Bake for bakery-quality desserts and treats, and Reheat to bring leftovers back to life with crispy, flavorful results
Servings and timing
This recipe yields approximately 10 to 12 servings. Preparation time is about 15 minutes, with an additional 20 minutes for cooling. Total time required is roughly 35 minutes.
Storage/reheating
Store Butterfinger Puppy Chow in an airtight container at room temperature for up to five days. For longer storage, it can be refrigerated, though it is best enjoyed at room temperature. Reheating is not required.
Variations and Customizations
Butterfinger Puppy Chow is easy to customize based on personal preference. For a richer chocolate flavor, dark chocolate chips can be used instead of semi-sweet. If you enjoy extra crunch, additional crushed Butterfinger pieces can be sprinkled over the top after coating.
You can also experiment with different cereals, such as corn or wheat squares, while keeping the method the same. For a slightly less sweet version, reduce the powdered sugar and rely more on the candy for sweetness.
Seasonal variations work well too. Adding festive sprinkles makes this snack ideal for holidays, while mixing in pretzels introduces a salty contrast. These small adjustments allow you to adapt the recipe without changing its core appeal.
FAQs
What is Puppy Chow also called?
It is often referred to as Muddy Buddies.
Can I make this recipe ahead of time?
Yes, it stores well and can be made several days in advance.
Do I need to refrigerate it?
No, room temperature storage is sufficient if kept airtight.
Can I use chunky peanut butter?
Chunky peanut butter can be used, but it may coat less evenly.
How finely should the Butterfinger be crushed?
Small pieces work best for even distribution.
Can I reduce the sugar?
Yes, reducing the powdered sugar will make it less sweet.
Is this recipe gluten-free?
It can be if gluten-free cereal is used.
Can I use white chocolate?
Yes, but the flavor will be noticeably sweeter.
How do I prevent clumping?
Shake gently and allow the coating to cool fully.
Is this suitable for gifting?
Yes, it travels well and makes an excellent homemade gift.
Conclusion
Butterfinger Puppy Chow is a simple yet highly satisfying treat that combines classic flavors with a playful twist. Its no-bake preparation, bold taste, and crunchy texture make it a dependable choice for any occasion. Whether shared with guests or enjoyed at home, this recipe delivers consistent flavor and irresistible appeal in every bite.
Hungry for more? Visit our website for full recipes and follow us on Pinterest for daily foodie inspo you’ll love to pin!