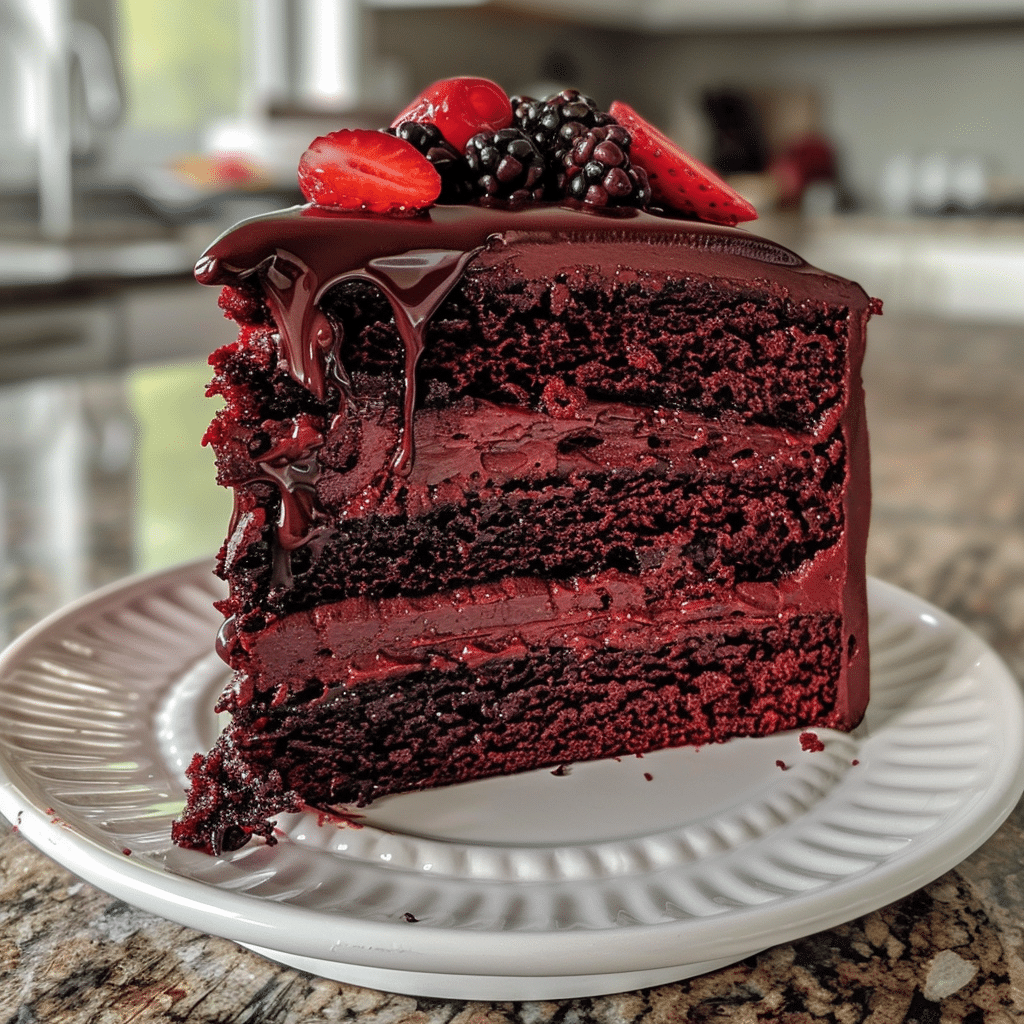
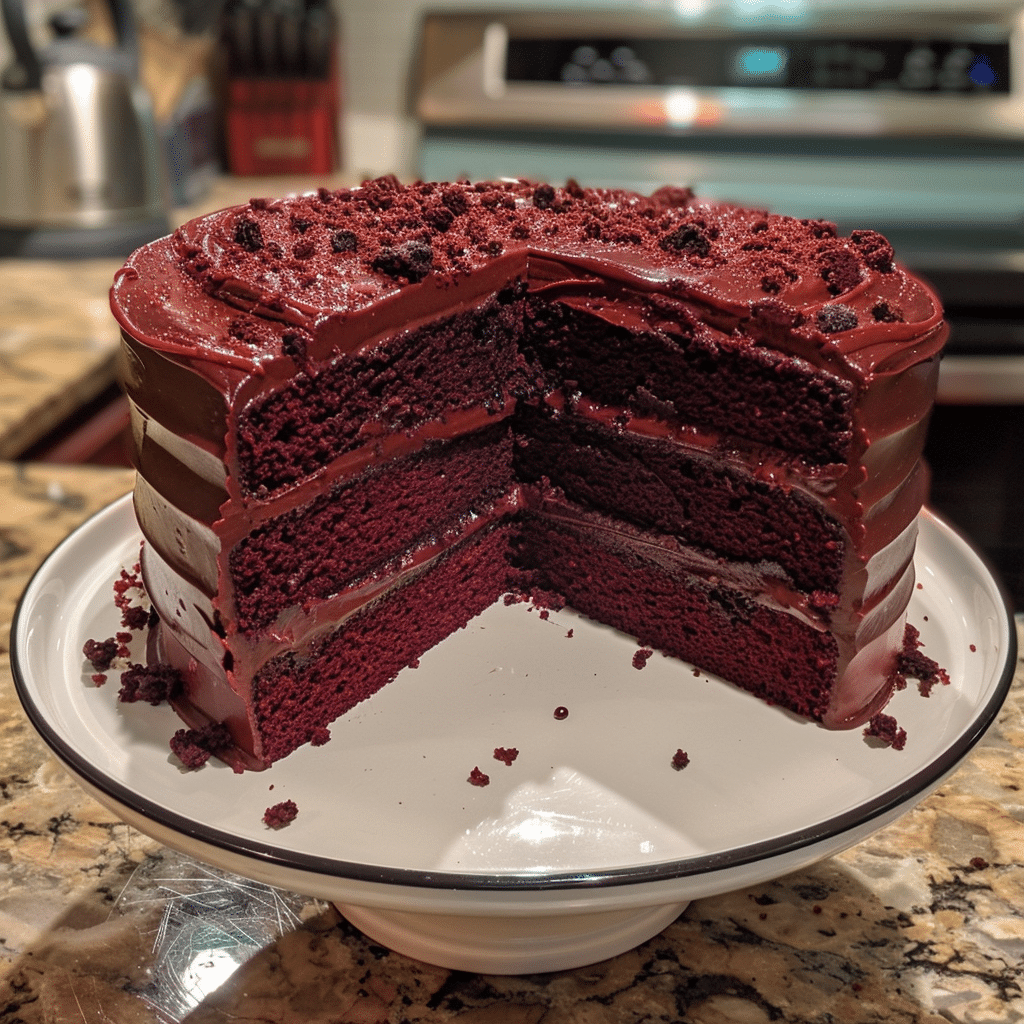
Red velvet chocolate layer cake is the ultimate show-stopper—rich, tender layers of red velvet cake paired with silky chocolate frosting for a dessert that’s as stunning as it is delicious. The hint of cocoa in the red velvet perfectly complements the deep chocolate filling, creating a balance of flavor that’s both classic and indulgent. I first made this cake for Valentine’s Day, and it quickly became my go-to celebration dessert. I love how each slice looks so beautiful with its vivid red layers and luscious chocolate frosting. Once, I added a touch of espresso to the frosting, and it deepened the chocolate flavor even more. Whether you’re baking for a birthday, holiday, or simply to treat yourself, this red velvet chocolate layer cake delivers pure elegance in every bite.
Why You’ll Love This Recipe
This red velvet chocolate layer cake combines the iconic tang and tenderness of red velvet with the richness of chocolate. The texture is soft and moist, with just enough cocoa for depth without overpowering the cake’s signature flavor. The chocolate frosting is smooth, creamy, and perfectly complements the red velvet crumb. It’s an impressive dessert that’s surprisingly easy to make and decorate, making it perfect for any special occasion. Every bite is sweet, velvety, and utterly satisfying.
Print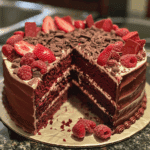
Red Velvet Chocolate Layer Cake – Rich, Moist, and Elegantly Decadent
- Total Time: 1 hour 5 minutes (plus cooling time)
- Yield: 12 servings
- Diet: Vegetarian
Description
Red Velvet Chocolate Layer Cake is a show-stopping dessert featuring moist layers of red velvet and rich chocolate cake, frosted with silky cream cheese frosting — an indulgent treat that’s as beautiful as it is delicious.
Ingredients
- For the Red Velvet Cake Layer:
- 1 ½ cups all-purpose flour
- 1 cup granulated sugar
- 1 tablespoon unsweetened cocoa powder
- 1 teaspoon baking soda
- ½ teaspoon salt
- 1 cup buttermilk, room temperature
- ½ cup vegetable oil
- 2 large eggs
- 1 teaspoon white vinegar
- 1 teaspoon vanilla extract
- 1 tablespoon red food coloring
- For the Chocolate Cake Layer:
- 1 ½ cups all-purpose flour
- 1 cup granulated sugar
- ½ cup unsweetened cocoa powder
- 1 ½ teaspoons baking powder
- ½ teaspoon baking soda
- ½ teaspoon salt
- 2 large eggs
- ¾ cup buttermilk
- ½ cup vegetable oil
- ¾ cup hot water or coffee
- 1 teaspoon vanilla extract
- For the Cream Cheese Frosting:
- 16 ounces cream cheese, softened
- ½ cup unsalted butter, softened
- 4 cups powdered sugar
- 2 teaspoons vanilla extract
Instructions
- Preheat oven to 350°F (175°C). Grease and line two 9-inch round cake pans with parchment paper.
- Make the Red Velvet Cake: In a large bowl, whisk together flour, sugar, cocoa, baking soda, and salt. In another bowl, combine buttermilk, oil, eggs, vinegar, vanilla, and red food coloring. Mix wet and dry ingredients until smooth. Pour into one of the prepared pans.
- Make the Chocolate Cake: In a large bowl, whisk together flour, sugar, cocoa, baking powder, baking soda, and salt. In another bowl, whisk eggs, buttermilk, oil, and vanilla. Stir wet ingredients into the dry, then add hot water or coffee. Mix until smooth. Pour into the second prepared pan.
- Bake both cakes for 30–35 minutes, or until a toothpick inserted in the center comes out clean. Let cool completely on wire racks.
- Prepare the Frosting: Beat cream cheese and butter together until smooth and fluffy. Gradually add powdered sugar and vanilla, beating until creamy and spreadable.
- Assemble the Cake: Place the chocolate cake layer on a serving plate and spread a layer of frosting. Add the red velvet layer on top and frost the entire cake with the remaining frosting.
- Chill for 30 minutes before slicing for cleaner layers.
Notes
- For a deeper flavor, use brewed coffee in the chocolate layer instead of water.
- Decorate with chocolate shavings, red velvet crumbs, or fresh berries for an elegant touch.
- Store leftovers covered in the refrigerator for up to 5 days.
- Prep Time: 30 minutes
- Cook Time: 35 minutes
- Category: Dessert
- Method: Baking
- Cuisine: American
Ingredients
(Tip: You can find the complete list of ingredients and their measurements in the recipe card below.)
For the Red Velvet Cake
All-purpose flour – Provides structure while keeping the cake soft and tender.
Cocoa powder – Adds a hint of chocolate flavor that defines red velvet cake.
Baking soda and salt – Help the cake rise and enhance the overall flavor.
Butter and vegetable oil – A mix for a moist, rich crumb with a buttery taste.
Granulated sugar – Sweetens the cake and adds lightness.
Eggs – Bind the batter and contribute to the cake’s tender texture.
Buttermilk – Adds tanginess and keeps the cake moist.
Vinegar – Reacts with the cocoa to give red velvet its distinctive flavor and color.
Red food coloring – Gives the cake its vibrant, signature red hue.
Vanilla extract – Adds depth and warmth to the flavor.
For the Chocolate Frosting
Butter (unsalted) – The base of a rich, smooth frosting.
Cocoa powder – Gives the frosting a deep, chocolatey flavor.
Powdered sugar – Sweetens and creates a silky texture.
Heavy cream or milk – Helps achieve the perfect spreading consistency.
Vanilla extract – Enhances the chocolate flavor.
Salt – Balances the sweetness.
Directions
Preheat your oven to 350°F (175°C). Grease and line two 8-inch round cake pans with parchment paper.
In a bowl, whisk together flour, cocoa powder, baking soda, and salt. In another large bowl, cream the butter, oil, and sugar until light and fluffy. Add the eggs one at a time, beating well after each. Mix in the vanilla, vinegar, and red food coloring.
Alternate adding the dry ingredients and buttermilk to the wet mixture, beginning and ending with the dry ingredients. Mix until smooth and just combined—do not overmix.
Divide the batter evenly between the pans and smooth the tops. Bake for 25–30 minutes, or until a toothpick inserted in the center comes out clean. Cool the cakes in the pans for 10 minutes, then transfer to wire racks to cool completely.
While the cakes cool, make the chocolate frosting. Beat butter until creamy, then sift in cocoa powder and mix until smooth. Gradually add powdered sugar, alternating with small amounts of cream, until fluffy and spreadable. Stir in vanilla and salt.
Once the cakes are fully cooled, spread a thick layer of chocolate frosting over one layer, top with the second layer, and frost the entire cake. Smooth the sides or create swirls for a rustic look. Chill slightly before slicing for clean layers.
Equipment needed
Must-Have Tools to Get Rolling
Here’s what you’ll want to have on hand:
Silicone Spatula – Durable, heat-resistant silicone spatula perfect for mixing, scraping, and spreading. Gentle on non-stick cookware and easy to clean.
Large pot – You’ll need this to boil the whole cabbage head and soften the leaves.
large bowl –Spacious, durable large bowl ideal for mixing, serving, or food preparation. Made from sturdy material and easy to clean.
Sharp knife – For coring the cabbage and slicing out the thick stem in each leaf. A paring knife works best.
Mixing bowl – A big bowl makes it easier to combine your meat and rice filling evenly.
Cutting board – For prepping cabbage leaves and rolling them like a pro.
9×13-inch baking dish – Ideal size to fit your rolled cabbage leaves snugly and prevent them from unraveling.
knife – A sharp, durable kitchen knife perfect for slicing, chopping, and dicing with ease.
Servings and timing
This recipe serves 10–12 people.
Preparation time: 25 minutes
Baking time: 30 minutes
Cooling and frosting time: 1 hour
Total time: Approximately 2 hours
Storage/reheating
Store the cake covered at room temperature for up to 2 days or refrigerate for up to 5 days. For the best texture, bring refrigerated cake slices to room temperature before serving. You can also freeze unfrosted cake layers for up to 2 months—wrap tightly in plastic and thaw before assembling.
Variations and Customizations
Cream Cheese Frosting Version – Swap chocolate frosting for tangy cream cheese frosting for a classic red velvet touch.
Chocolate Ganache Topping – Pour a glossy ganache over the top for an elegant finish.
Layered Berry Cake – Add a thin layer of raspberry jam or fresh berries between the cake layers.
Espresso-Infused Frosting – Add a teaspoon of espresso powder to the chocolate frosting for a deeper flavor.
White Chocolate Frosting – Use white chocolate buttercream for a beautiful color contrast.
Mini Cakes – Bake the batter in cupcake tins for individual servings.
Marble Effect – Swirl chocolate batter into one of the layers for a marbled red velvet look.
FAQs
Can I make this cake ahead of time?
Yes, bake the layers a day in advance and frost before serving.
Can I use natural cocoa instead of Dutch-processed?
Yes, but natural cocoa gives a slightly tangier flavor and lighter color.
Can I substitute buttermilk?
Mix 1 cup of milk with 1 tablespoon of vinegar or lemon juice as a substitute.
Why use both butter and oil?
Butter adds flavor, while oil keeps the cake moist and soft.
Can I make this gluten-free?
Yes, use a 1:1 gluten-free flour blend.
Can I use this recipe for cupcakes?
Yes, bake for 18–20 minutes in a lined muffin tin.
Can I use cream cheese frosting instead?
Absolutely—it’s a classic red velvet pairing.
Why did my cake sink in the middle?
Overmixing or opening the oven too early can cause sinking—be gentle with the batter.
Can I add nuts or chocolate chips?
Yes, fold them into the batter for added texture.
How can I make the red color more vibrant?
Use gel food coloring instead of liquid for a bolder hue.
Conclusion
This Red Velvet Chocolate Layer Cake is a stunning centerpiece that combines elegance and decadence in every slice. The soft, velvety layers and rich chocolate frosting create a flavor pairing that’s both timeless and irresistible. Whether for celebrations, holidays, or simply when you want to bake something special, this cake promises to impress every guest at the table. Beautiful, moist, and perfectly balanced, it’s a dessert that looks as good as it tastes—pure indulgence in every forkful.