
Why You’ll Love This Recipe
Eggnog Gingerbread Thumbprint Cookies combine two beloved holiday flavours—spiced gingerbread and creamy eggnog—into one irresistible bite. These cookies are beautifully soft, warmly spiced, and filled with a luscious eggnog-inspired centre that sets them apart from traditional thumbprints. They look stunning on a Christmas cookie tray and offer a nostalgic flavour profile that feels unmistakably festive.
I especially love how reliably this dough comes together; even when I chilled it a little longer than intended, the cookies still baked perfectly soft. The balance between the deep molasses notes and the creamy eggnog filling creates a memorable contrast that guests always comment on. Whether you are hosting a cookie exchange, preparing homemade gifts, or baking with family, these thumbprints add a cosy, seasonal elegance to your holiday baking collection.
Print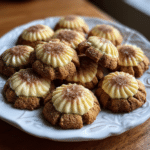
Eggnog Gingerbread Thumbprint Cookies: A Festive Twist on a Classic Holiday Treat
- Total Time: 32 mins
- Yield: 30 cookies
- Diet: Vegetarian
Description
Soft and spiced gingerbread thumbprint cookies filled with creamy eggnog icing—festive, cozy, and perfect for holiday cookie trays.
Ingredients
- 2 1/4 cups all-purpose flour
- 1 tsp baking soda
- 1 tsp ground ginger
- 1 tsp ground cinnamon
- 1/4 tsp nutmeg
- 1/4 tsp cloves
- 1/4 tsp salt
- 1/2 cup unsalted butter, softened
- 1/2 cup brown sugar, packed
- 1/2 cup molasses
- 1 large egg
- 1 tsp vanilla extract
- For the eggnog filling:
- 1 cup powdered sugar
- 2–3 tbsp eggnog
- 1/4 tsp nutmeg
Instructions
- Preheat oven to 350°F (175°C). Line a baking sheet with parchment paper.
- In a bowl, whisk together flour, baking soda, ginger, cinnamon, nutmeg, cloves, and salt.
- In a separate bowl, cream the butter and brown sugar until fluffy.
- Mix in the molasses, egg, and vanilla extract.
- Gradually add the dry ingredients and mix until a dough forms.
- Roll dough into 1-inch balls and place on prepared baking sheet.
- Use your thumb or a small spoon to press an indentation in the center of each cookie.
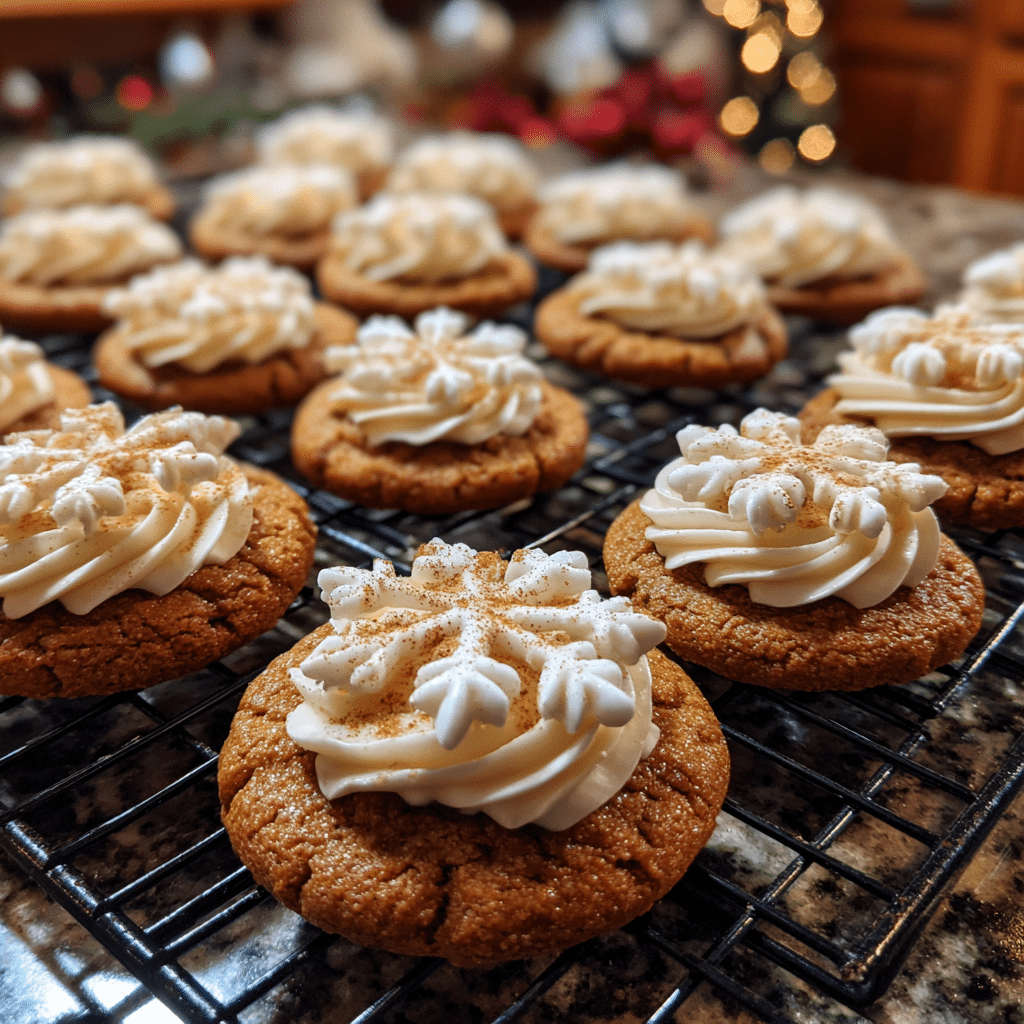
- Bake for 10–12 minutes, then reinforce the indentation while warm.
- Let cookies cool completely.
- For the filling, whisk powdered sugar, eggnog, and nutmeg until thick and smooth.
- Spoon or pipe filling into the center of each cooled cookie.
Notes
- Chill dough for 20 minutes if too sticky to roll.
- Swap eggnog icing for vanilla glaze if preferred.
- Store cookies in the refrigerator because of the eggnog filling.
- Prep Time: 20 mins
- Cook Time: 12 mins
- Category: Dessert
- Method: Baking
- Cuisine: American
Ingredients
(Tip: You can find the complete list of ingredients and their measurements in the recipe card below.)
All-purpose flour
Provides the structure that helps the cookies hold their iconic thumbprint shape.
Ground ginger
Supplies the signature warmth of gingerbread.
Ground cinnamon
Adds aromatic sweetness and depth.
Ground cloves
Enhances the spice profile with a hint of intensity.
Baking soda
Ensures the cookies rise lightly while staying soft.
Salt
Balances the rich molasses and spices.
Butter
Creates a tender, melt-in-your-mouth texture.
Brown sugar
Adds moisture and caramel undertones that pair beautifully with gingerbread spices.
Molasses
The defining ingredient that gives gingerbread its deep, rich flavour.
Egg
Helps bind the dough and contributes to its soft consistency.
Eggnog
Used in the filling for creamy, festive richness.
Powdered sugar
Creates a smooth, sweet base for the eggnog filling.
Vanilla extract
Enhances both the dough and the filling with warm, aromatic notes.
Nutmeg
A classic eggnog spice that brings the filling to life.
Directions
Start by whisking together the flour, ginger, cinnamon, cloves, baking soda, and salt in a medium bowl. In a separate large bowl, cream the butter and brown sugar until light and fluffy. Add the egg and molasses, mixing until fully incorporated. Gradually fold in the dry ingredients until a soft dough forms. Cover and chill for at least one hour; this helps the cookies hold their shape during baking.
Once chilled, preheat your oven and line a baking sheet with parchment paper. Roll the dough into small balls and place them evenly spaced on the sheet. Using your thumb or the back of a teaspoon, gently press a small well into the centre of each dough ball. Bake until the cookies are set around the edges but still soft in the middle.
While they cool, prepare the filling by whisking powdered sugar, eggnog, vanilla, and nutmeg until smooth and spoonable. Once the cookies are fully cooled, fill each indentation with a small dollop of the eggnog mixture. Allow the filling to set before serving. The result is a beautifully balanced cookie with festive flavour in every bite.
Equipment needed
Must-Have Tools to Get Rolling
Here’s what you’ll want to have on hand:
Silicone Spatula – Durable, heat-resistant silicone spatula perfect for mixing, scraping, and spreading. Gentle on non-stick cookware and easy to clean.
Large pot – You’ll need this to boil the whole cabbage head and soften the leaves.
large bowl –Spacious, durable large bowl ideal for mixing, serving, or food preparation. Made from sturdy material and easy to clean.
Sharp knife – For coring the cabbage and slicing out the thick stem in each leaf. A paring knife works best.
Mixing bowl – A big bowl makes it easier to combine your meat and rice filling evenly.
Cutting board – For prepping cabbage leaves and rolling them like a pro.
9×13-inch baking dish – Ideal size to fit your rolled cabbage leaves snugly and prevent them from unraveling.
knife – A sharp, durable kitchen knife perfect for slicing, chopping, and dicing with ease.
Servings and timing
Makes approximately 24 cookies.
Preparation time: 20 minutes
Chill time: 1 hour
Baking time: 10–12 minutes
Cooling and filling time: 20 minutes
Storage/reheating
Store the cookies in an airtight container in the refrigerator for up to five days, as the eggnog filling is perishable. For longer storage, freeze the unfilled cookies for up to three months and add the filling after thawing. Avoid reheating; these cookies are meant to be enjoyed at room temperature.
Variations and Customizations
Eggnog Buttercream Filling
Swap the simple filling for a thicker eggnog buttercream for added richness.
White Chocolate Drizzle
Add a delicate drizzle of melted white chocolate over the cooled cookies.
Spiced Sugar Coating
Roll dough balls in cinnamon sugar before baking for extra texture.
Maple Molasses Twist
Add a touch of maple extract for a deeper, woodsy sweetness.
Dark Chocolate Centre
Replace the eggnog filling with melted dark chocolate for a non-traditional twist.
Cream Cheese Eggnog Filling
Blend cream cheese into the filling for tangy richness.
Gluten-Free Version
Substitute the flour with a gluten-free baking blend.
Extra Spice Boost
Increase the ginger and cinnamon for bolder flavour.
Almond Extract Note
Add a drop of almond extract to the dough for a subtle holiday fragrance.
Peppermint Accent
Add a hint of peppermint to the filling for a refreshing contrast to the gingerbread.
FAQs
Why did my cookies spread too much?
The dough may not have been chilled long enough; ensure at least one hour of chilling.
Can I make the filling thicker?
Add extra powdered sugar until it reaches your desired consistency.
Can I use store-bought eggnog?
Yes, any variety works well for the filling.
Do I need to refrigerate the finished cookies?
Yes, due to the eggnog filling.
Can I freeze the dough?
Yes, freeze for up to three months and thaw before shaping.
How do I prevent the thumbprint from puffing up?
Re-press the indentation gently right after baking.
Can I make them dairy-free?
Use dairy-free butter and eggnog alternatives.
Is molasses required?
It is essential for the gingerbread flavour; do not omit it.
Can I double this recipe?
Yes, the dough scales very well.
Why is my filling runny?
Add more powdered sugar or chill slightly before filling.
Conclusion
Eggnog Gingerbread Thumbprint Cookies bring festive warmth, spice, and creamy indulgence together in a beautifully nostalgic treat. They are simple to prepare, visually striking, and full of classic holiday flavour. Whether you are baking for a party, a cookie exchange, or seasonal gifting, these thumbprints will quickly become a cherished part of your holiday traditions.
Hungry for more? Visit our website for full recipes and follow us on Pinterest for daily foodie inspo you’ll love to pin!