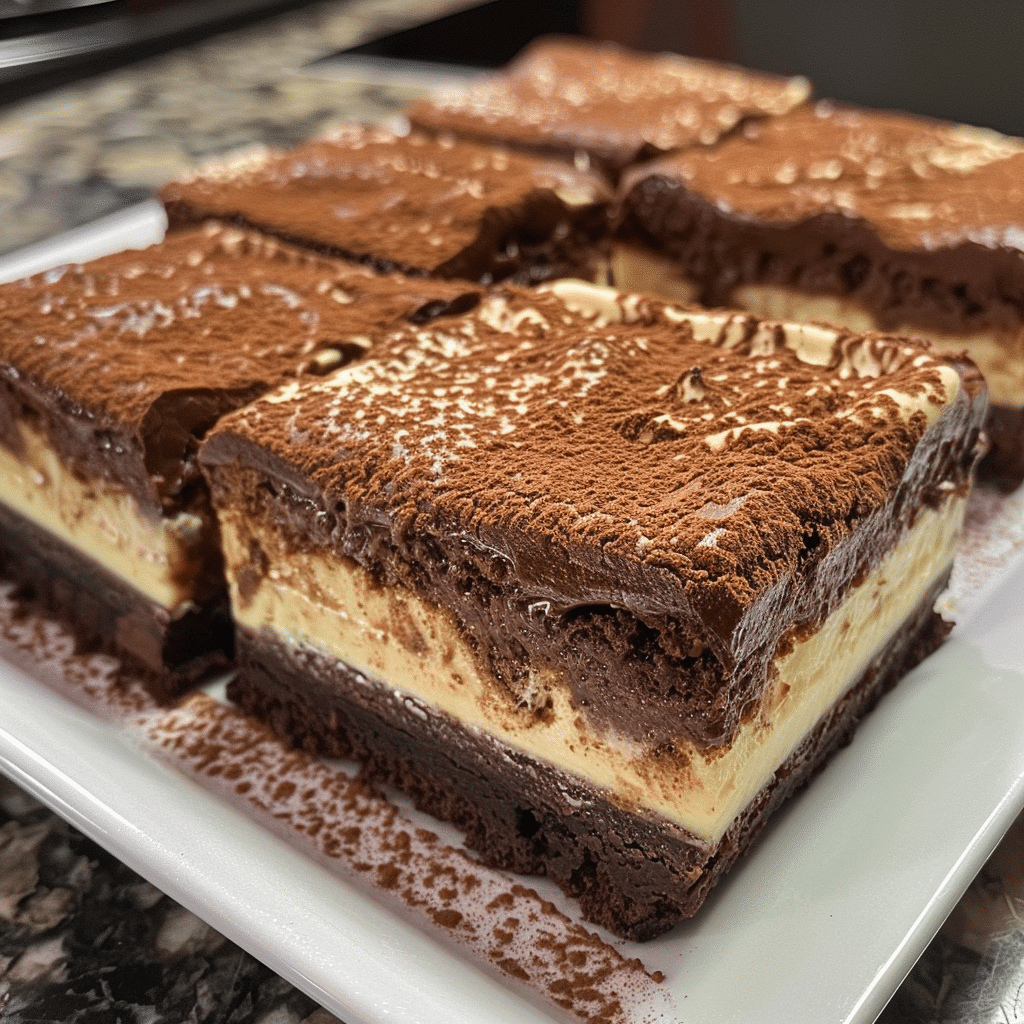
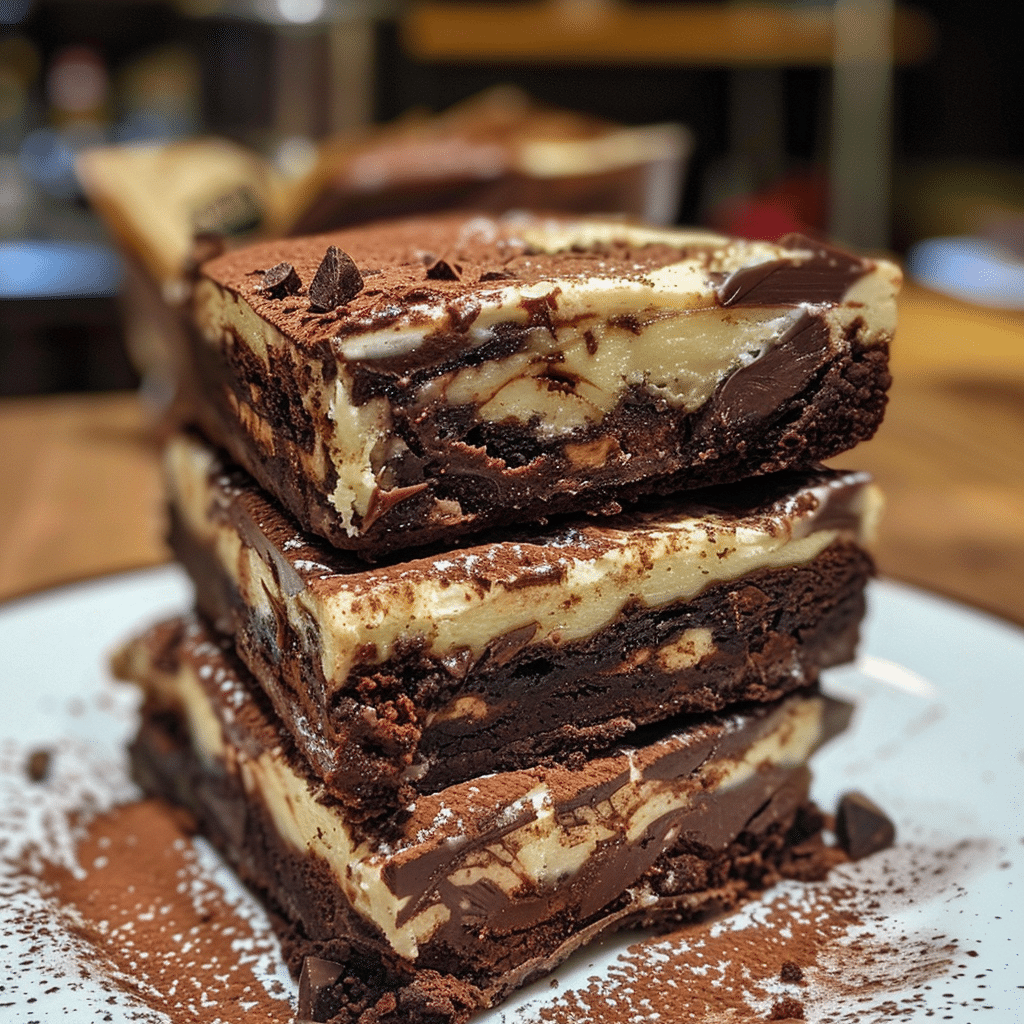
If you’ve ever found yourself torn between a rich brownie and a creamy tiramisu, this Tiramisu Brownies recipe will make you wonder why you ever had to choose. It’s the perfect blend of fudgy chocolate goodness and luscious mascarpone cream, layered with subtle coffee notes that bring both worlds together in harmony. I tried this version with espresso powder instead of brewed coffee, and it intensified the flavor beautifully without adding extra moisture. These brownies are ideal for special occasions, dinner parties, or simply as an elegant twist on your classic brownie recipe. Each bite offers a balance of deep cocoa richness, smooth cream, and a whisper of coffee — indulgent yet refined.
Why You’ll Love This Recipe
This dessert combines the best features of both tiramisu and brownies — the dense, chocolatey texture of brownies paired with the creamy, coffee-infused mascarpone layer of tiramisu. It’s impressive yet surprisingly easy to make, requiring just a few pantry staples and a bit of layering magic. Perfect with a cup of coffee or served as a show-stopping dessert at your next gathering, these tiramisu brownies are guaranteed to steal the spotlight.
Print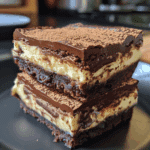
Tiramisu Brownies: A Decadent Fusion of Two Classics
- Total Time: 2 hrs 50 mins (including chilling)
- Yield: 9 servings
- Diet: Vegetarian
Description
Tiramisu brownies combine the rich, fudgy texture of classic brownies with the creamy, coffee-infused flavors of tiramisu, creating a luxurious dessert perfect for coffee and chocolate lovers alike.
Ingredients
- 1/2 cup unsalted butter
- 3/4 cup semi-sweet chocolate chips
- 3/4 cup granulated sugar
- 1/4 cup brown sugar
- 2 large eggs
- 1 teaspoon vanilla extract
- 1/2 cup all-purpose flour
- 2 tablespoons unsweetened cocoa powder
- 1/4 teaspoon salt
- 6–8 ladyfinger cookies
- 1/4 cup brewed espresso or strong coffee
- 1 tablespoon coffee liqueur (optional)
- 1 cup mascarpone cheese
- 1/2 cup heavy cream
- 1/4 cup powdered sugar
- Cocoa powder, for dusting
Instructions
- Preheat oven to 350°F (175°C). Line an 8-inch square baking pan with parchment paper and lightly grease it.
- In a heatproof bowl, melt the butter and chocolate chips together until smooth. Let cool slightly.
- Whisk in the granulated and brown sugars until well combined, then add eggs and vanilla extract and mix until glossy and thick.
- Fold in the flour, cocoa powder, and salt until just incorporated. Do not overmix.
- Pour the brownie batter into the prepared pan and spread evenly.
- Bake for 20–25 minutes or until a toothpick inserted in the center comes out with moist crumbs. Let cool completely.
- Mix the espresso and coffee liqueur in a shallow bowl. Quickly dip each ladyfinger into the mixture and arrange them over the cooled brownies.
- In a separate bowl, beat mascarpone cheese, heavy cream, and powdered sugar until smooth and fluffy.
- Spread the mascarpone cream evenly over the ladyfingers layer.
- Dust the top generously with cocoa powder, then refrigerate for at least 2 hours before slicing and serving.
Notes
- For extra depth of flavor, use dark chocolate instead of semi-sweet chocolate.
- Make sure to dip the ladyfingers briefly to avoid sogginess.
- Chill overnight for the best flavor and texture.
- Substitute cream cheese for mascarpone if unavailable.
- Prep Time: 25 mins
- Cook Time: 25 mins
- Category: Dessert
- Method: Baked and Chilled
- Cuisine: Italian-American
Ingredients
(Tip: You can find the complete list of ingredients and their measurements in the recipe card below.)
Unsalted butter – Creates that rich, fudgy base and gives the brownies their irresistible texture.
Dark chocolate – The heart of this dessert. Choose high-quality chocolate with at least 70% cocoa for an intense flavor.
Sugar – Sweetens both the brownie and mascarpone layers while balancing the bitterness of the cocoa and coffee.
Eggs – Add structure and help the brownies achieve that perfect chewy consistency.
All-purpose flour – Keeps the brownies dense and moist without becoming cakey.
Cocoa powder – Enhances the chocolate depth and gives a luxurious, rich tone to the base.
Espresso powder or strong brewed coffee – Brings out the tiramisu flavor and complements the chocolate beautifully.
Mascarpone cheese – The star of the creamy layer, lending a velvety texture and mild sweetness that defines tiramisu.
Vanilla extract – Adds warmth and complexity to both the brownie and cream layers.
Salt – A pinch enhances all the flavors, cutting through the sweetness and rounding out the taste.
Cocoa powder or grated chocolate (for dusting) – A final dusting gives the dessert that signature tiramisu finish.
Directions
Preheat your oven to 350°F (175°C). Line an 8×8-inch baking pan with parchment paper, leaving a bit of overhang for easy removal.
In a medium saucepan, melt butter and dark chocolate together over low heat, stirring until smooth. Remove from heat and whisk in sugar until fully dissolved. Add the eggs one at a time, whisking well after each addition, followed by the vanilla extract. Stir in flour, cocoa powder, espresso powder, and salt until the batter is glossy and thick. Pour half the brownie batter into the prepared pan and smooth the top.
In a separate bowl, beat mascarpone cheese, sugar, egg, and a touch of vanilla until smooth. Spread this mascarpone mixture over the brownie layer, then gently pour the remaining brownie batter on top, swirling lightly with a knife to create a marbled effect.
Bake for 35–40 minutes, or until the center is just set and a toothpick inserted comes out with a few moist crumbs. Cool completely in the pan. Once cooled, dust generously with cocoa powder or finely grated chocolate. Chill for at least an hour before slicing — this helps the layers set perfectly.
Equipment needed :
Must-Have Tools to Get Rolling
Here’s what you’ll want to have on hand:
Silicone Spatula – Durable, heat-resistant silicone spatula perfect for mixing, scraping, and spreading. Gentle on non-stick cookware and easy to clean.
Large pot – You’ll need this to boil the whole cabbage head and soften the leaves.
large bowl –Spacious, durable large bowl ideal for mixing, serving, or food preparation. Made from sturdy material and easy to clean.
Sharp knife – For coring the cabbage and slicing out the thick stem in each leaf. A paring knife works best.
Mixing bowl – A big bowl makes it easier to combine your meat and rice filling evenly.
Cutting board – For prepping cabbage leaves and rolling them like a pro.
9×13-inch baking dish – Ideal size to fit your rolled cabbage leaves snugly and prevent them from unraveling.
knife – A sharp, durable kitchen knife perfect for slicing, chopping, and dicing with ease.
Servings and timing
This recipe makes 12 rich squares.
Prep time: 20 minutes
Cook time: 40 minutes
Cooling and chilling time: 1 hour
Total time: 2 hours
Storage/reheating
Store tiramisu brownies in an airtight container in the refrigerator for up to 5 days. Serve chilled or allow them to sit at room temperature for 10–15 minutes before eating for a softer texture. You can also freeze them (without the cocoa dusting) for up to 2 months. Thaw overnight in the refrigerator and dust with fresh cocoa before serving.
Variations and Customizations
Coffee Lovers’ Boost – Add a tablespoon of Kahlúa or espresso liqueur to the mascarpone layer for an adult twist.
White Chocolate Swirl – Drizzle melted white chocolate into the top layer before baking for extra richness.
Nutty Crunch – Fold chopped hazelnuts or walnuts into the brownie batter for added texture.
Gluten-Free Option – Use a high-quality gluten-free flour blend instead of all-purpose flour.
Dairy-Free Version – Replace butter with coconut oil and use dairy-free cream cheese in place of mascarpone.
Mocha Brownies – Add a teaspoon of instant espresso to the brownie batter for a stronger coffee kick.
Layered Tiramisu Brownie Bars – Once baked, top with an additional layer of whipped mascarpone and dust with cocoa for a true tiramisu-style dessert.
Raspberry Tiramisu Brownies – Add a layer of fresh raspberries or a swirl of raspberry jam before baking for a fruity contrast.
Mini Brownie Bites – Bake in muffin tins for individual servings perfect for parties.
Frosted Finish – Top with a light chocolate ganache for a glossy, elegant presentation.
FAQs
Can I use cream cheese instead of mascarpone?
Yes, but mascarpone gives a smoother and more authentic tiramisu flavor.
Can I skip the coffee?
You can replace it with milk or hot water, but the coffee flavor enhances the overall richness.
How do I get clean slices?
Chill the brownies first, then slice with a sharp knife wiped clean between cuts.
Are these brownies gluten-free?
They can be — simply substitute gluten-free flour for all-purpose.
Can I make these ahead of time?
Yes, they taste even better the next day after chilling overnight.
Can I freeze tiramisu brownies?
Absolutely. Freeze in layers separated by parchment paper for up to 2 months.
Can I use instant coffee instead of espresso powder?
Yes, dissolve 1 tablespoon of instant coffee in 2 tablespoons of hot water.
How do I know when the brownies are done?
The edges should be set, and the center should have a slight wobble that firms up as it cools.
What can I top them with besides cocoa powder?
Try grated chocolate, chocolate shavings, or even a dusting of powdered sugar.
Do I need to refrigerate tiramisu brownies?
Yes, because of the mascarpone layer, they should be stored in the fridge.
Conclusion
Tiramisu Brownies are the ultimate dessert fusion — rich, chocolatey, creamy, and delicately infused with coffee. Each bite captures the essence of both classic Italian tiramisu and indulgent brownies, making it an irresistible treat for any occasion. Whether you serve them chilled for a dinner party or enjoy one with your morning coffee, these brownies are pure decadence in every layer. Once you make them, you’ll never look at regular brownies the same way again.